
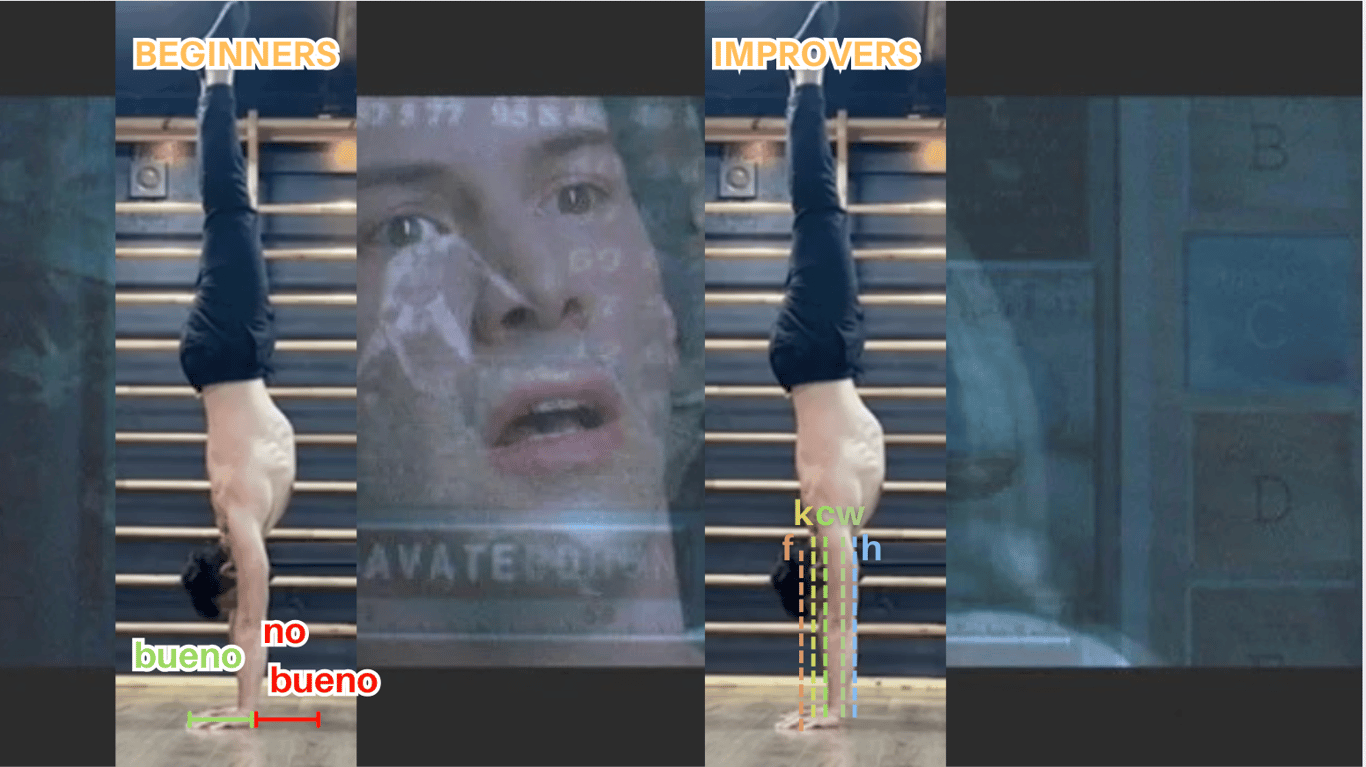
I have been beating the drum of “functional alignment” for a few years now.
The goal was to bring clarity to the learner by cutting through the bullshit and the dogma that is so pervasive on social media.
The culprit: a confusion between correlation (I am doing X, say squeeze my butt, when I get a good hold) and causation (squeezing my butt is necessary to get a good hold for me and everyone else).
The goal for the beginner is to identify:
- the position of the shoulders
- the position of the pelvis (as dictated by the shoulder angle, the level of arching in the lower back, and the pelvic tilt)
- the position of the legs
In order to find a functional shape, ie a position that can be practiced at the wall in such a way that it happens freestanding.
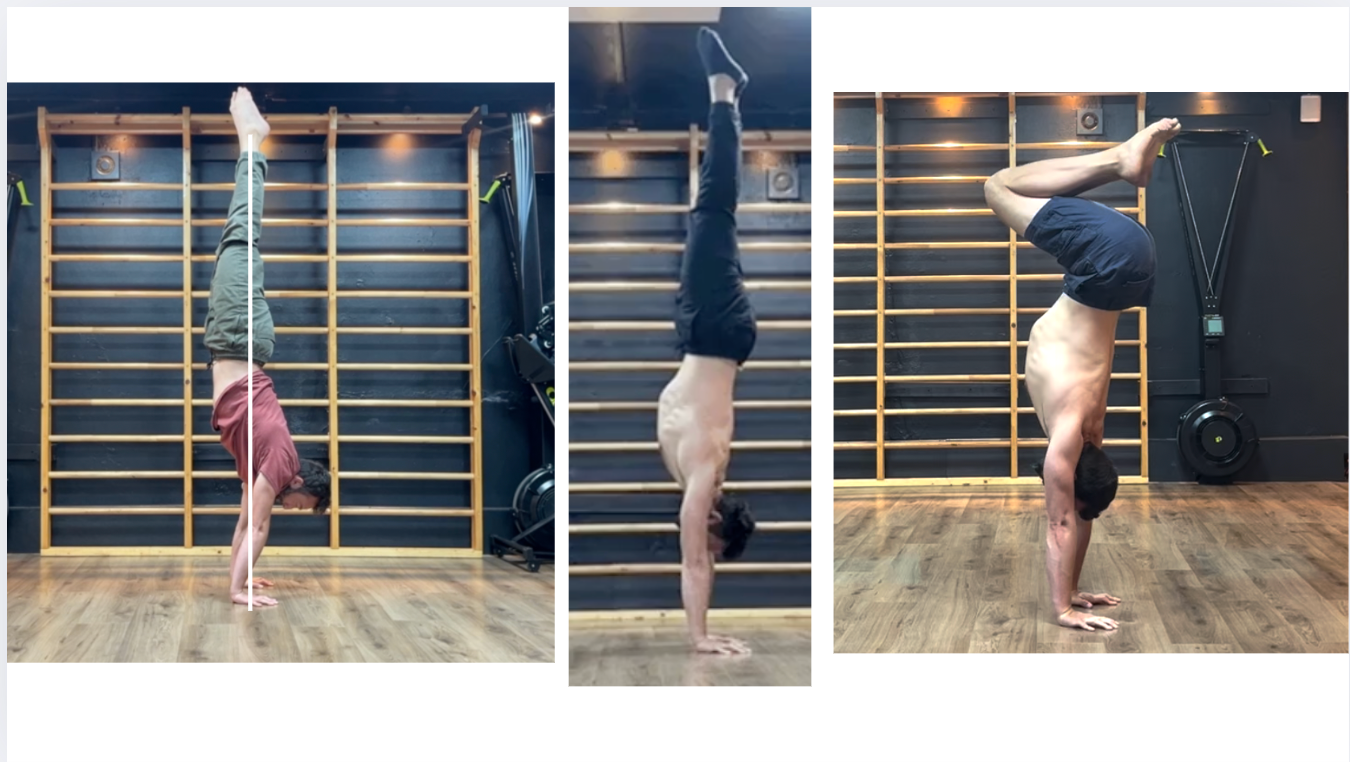
Lightness 2.0
As you get more experienced, you will start nuancing your perceptions and understanding of alignment (and pretty much everything else in handstands!).
For example, at first, there is a binary “not stacked” and “stacked” distinction we have to make. As we move towards the green belt and beyond, we’ll need to differentiate different shoulder stacks.
The tiny differences between one stack and the other has huge consequences on the placement of the rest of the body. Some will be preferable to look straighter, while others will need to be practiced to recover falling handstands better.
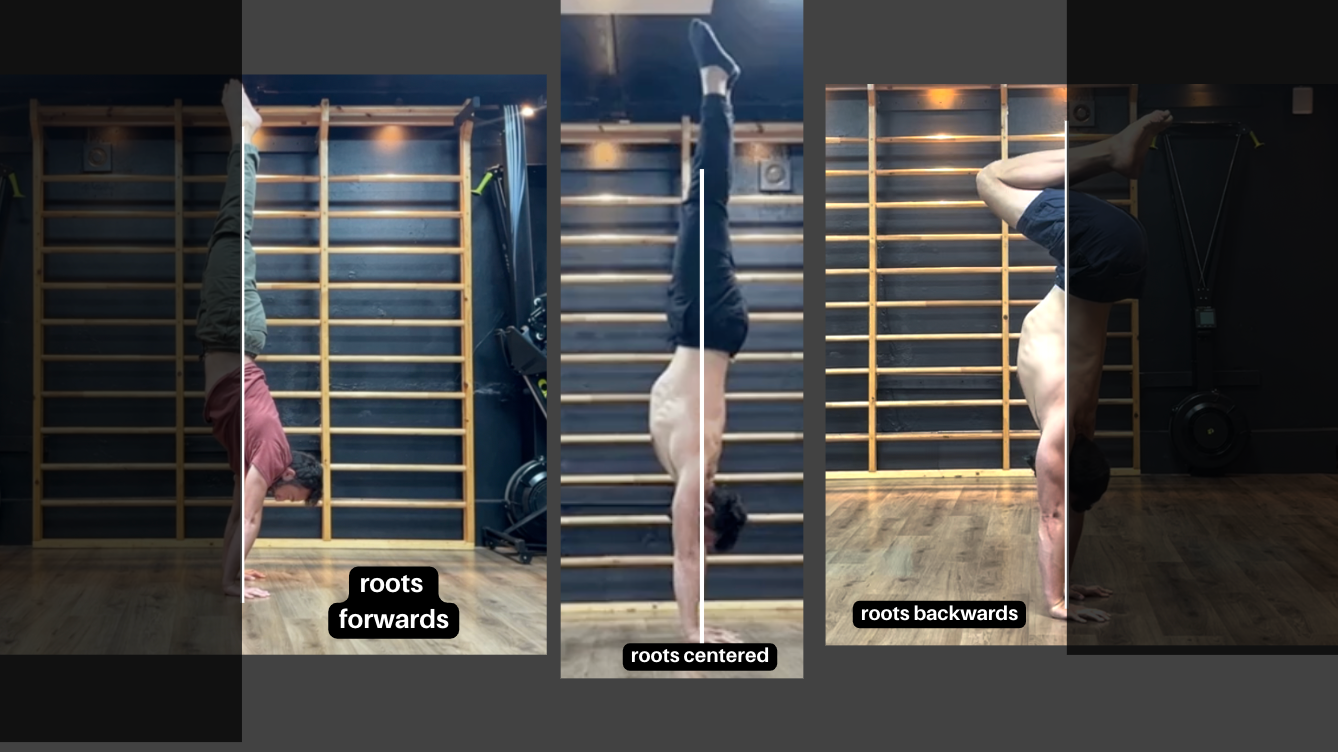
As an image that will help both the beginner and the improver understand what is at play here, I bring you: The tree 🌳.
Your handstand is a tree
And for simplicity sake, it will be comprised of two main parts: the roots and the branches.
The roots are your shoulder stack. Mess up with the roots, and the whole tree falls. The branches are attached to the trunk, which is attached to the roots.
The trunk will be your trunk (ah, convenient!). We can’t really do much with it.
The branches are your lower body as a whole. The wind can blow through it and make them move more or less gently, it doesn’t mean you’ll pull out the roots - the tree can withstand.
This reminds us that an alignment has to be understood from the ground up. What happens at the hands influences the position of your shoulders which, in turn, will dictate what happens in your lower body.
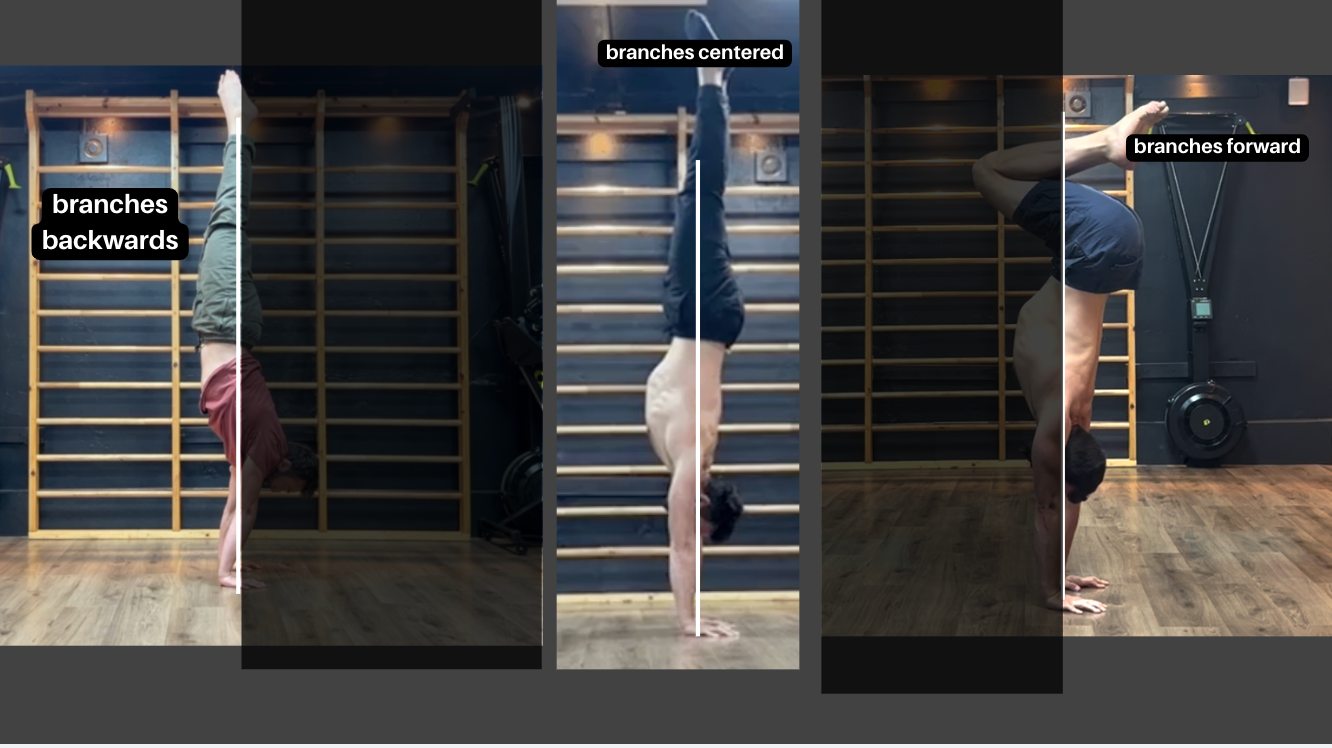
For the tree to stand, it only has one rule to follow:
nb: the vertical axis is defined as the line going from the centre of the your hands up to the ceiling
→ If the roots are centered, on the vertical axis, the branches can be centered.
→ If the roots are on either side of the vertical axis, the branches have to go on the other side.
A 2-step process
When working on understanding your alignment (beginners) or conquering other alignments (improvers, intermediates), you will need to bring things back to the wall.
To feel the effect of the root position on the branches, follow the following process:
- Kick-up against the wall. To the best of your ability, softly, and into the desired alignment, or as close to it as possible. Notice once landed the likely gaps between what you expected to do and align and what you ended up with.
- Step 1: set the roots. Set the desired shoulder stack. Unless the drill is about actively changing it while balancing, you will want to keep that stack the same throughout the drill
problem: the very action of balancing through your fingers (let’s not even talk about fall recovery) will make your shoulder stack… move! You grow to be super, duper aware of this.
- Step 2: set the branches. Now that the shoulder stack is set and still, adjust the position of the branches to find lightness against the wall. Discover how the tiniest change in the shoulder stack will need to be compensated for with the branches position.
 Made with Bullet